
Friday, September 30, 2011
Portrait Painting Progress
Thursday, September 1, 2011
The Layering Continues
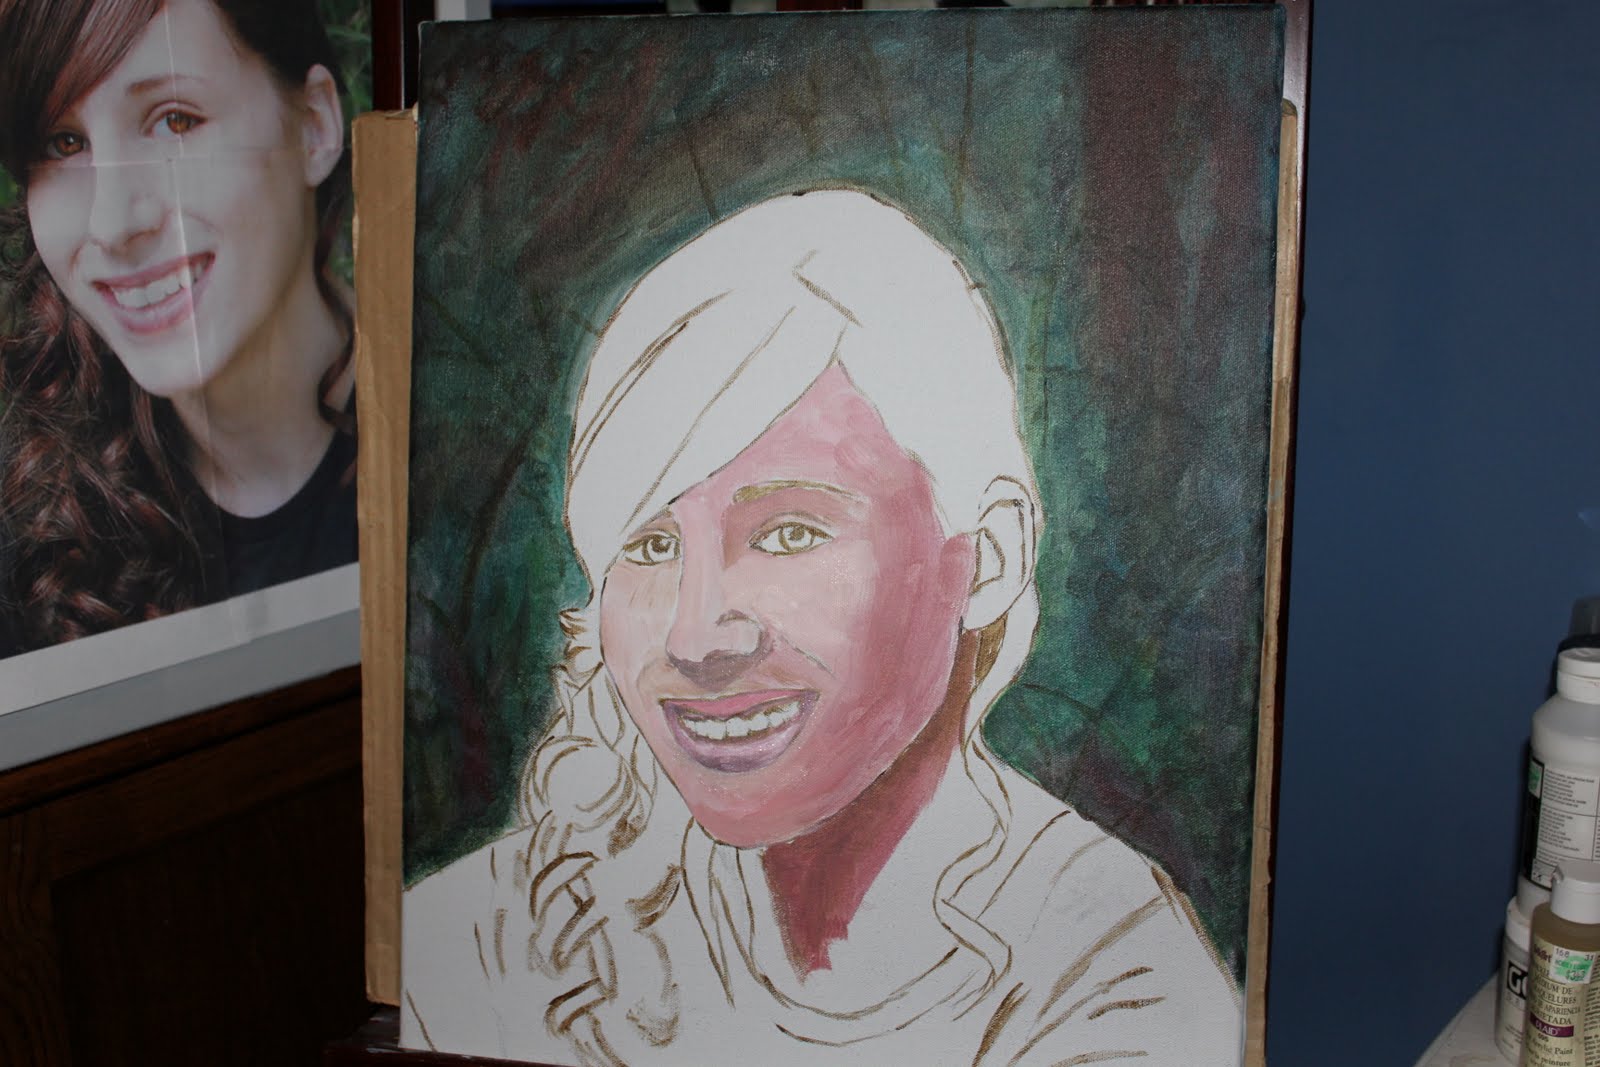
Each and every layer creates more depth but it is also creating a change in my subjects face. Not so sure I am liking the transformation.
As the last layer dried it looked a little chalky. I went in and added more warmth and deepened my shadows with a cooler tone.
There is much I have to learn before my painting can be considered "realism"... practice, practice, practice!
I will continue posting my transitions as I complete them.

As the last layer dried it looked a little chalky. I went in and added more warmth and deepened my shadows with a cooler tone.
There is much I have to learn before my painting can be considered "realism"... practice, practice, practice!
I will continue posting my transitions as I complete them.

Hair
Creating the Hair and Highlights
I began by mixing burnt sienna, yellow ochre, and ultramarine blue to build the base tones of the hair. From there, I layered in the highlights, letting lighter strokes sit softly over the darker foundation.
Hair takes practice—and then more practice—because its believability comes from multiple layers, even in a piece that isn’t fully realistic. This painting isn’t meant to look photographic, but I still wanted the hair to lean toward realism. To push it in that direction, I etched fine strands around the hairline, adding just enough detail to suggest texture and movement while keeping the overall style painterly.
 |
| Color block sections |
 |
| Add lights for dimension |
Wednesday, August 31, 2011
Eyes
Eyes are the soul of a painting. Trying to capture your subject's true essence is no small feat!
When I first began my painting the subject's eyes followed me from right to left. Since that time something happened and I lost it.
One of the things I do along my painting journey is photograph each step. It allows me to go back and see what I liked and disliked. Unfortunately, painting does not allow me to select the undo tab and go back. But having past photos of my work can offer insite of what I may have done wrong so that I can fix my "happy mistake"!

Oily Face
Once the acrylic dries (which only takes minutes instead of days or weeks) I begin using oil. I may not appreciate the length of time oil dries, however, I do appreciate the smoothness of this medium.
As you can see oil creates a smoother finish on the subject's face. The next several stages will be adding one layer at a time. Hopefully, with each layer the portrait will become more realistic. At least that is my goal.
One of the things I anticipate along the way our little mistakes and as Bob Ross states, They are "Happy Mistakes"! Got to love that guy, God rest his soul!
 |
| First layer of oil |
The Process
This time, I decided to try something a little different. I’d been reading that acrylics can work beautifully for an underpainting beneath oil paints, so I figured—why not? In my last oil portrait, I used oils from start to finish, including the underpainting, and it felt like I was waiting ages for each layer to dry. And since patience has never been my strongest virtue, I was ready for a better way.
 |
| Acrylic paints were used to begin the under painting process |
 |
| And continued with acrylic until everything was covered |
Oil Painting Of My Daughter
My daughter will be graduating next summer, and one of the things she asked for was a portrait painting—something personal and handmade to mark this milestone.
I started by taking several photos of her near our pond. A full-frontal shot didn’t feel right for the portrait I had in mind. Instead, a slight profile caught my eye. That angle offered richer shadows and a more interesting play of light—perfect for bringing depth into the painting.
Before transferring anything to canvas, I brought the photo into Photoshop. I enhanced the colors in her hair and skin and made her eyes a little more vivid, giving the reference image the life I plan to capture in paint.
To make sure the proportions stayed accurate—and to save a lot of time—I printed the reference as four separate 8×10 images and pieced them together like a puzzle. My canvas for this project is 16×20, so this method helped me scale everything precisely.
I love to sketch, but I’m not as accurate as I’d like to be. Some artists consider tracing or projecting an image “cheating,” but I see it as a practical tool. In the future, I’d love to invest in a projector so I don’t have to keep cutting, taping, and assembling large photo grids just to get the right image. Efficiency lets me put more energy into the actual painting—where the real magic happens.
 |
| Sketch on a 16x20 canvas |
 |
| Four 8x10 photos stitched |
Subscribe to:
Posts (Atom)
The Painting That Waited
Happy New Year! After a five-month hiatus, I’m thrilled to share what I’ve been working on since my last post in August 2025. Below is a pai...

-
 Once upon a time, high in the sky, a beautiful red bird soars. Angels shine down from the heavens offering solace to those in need from his ...
 -
 Enhancing folds and lettering At this stage, I wanted to give more depth to the t-shirt. First, I enhanced the folds by using a lighter shad...
 -
 I have been waiting patiently for this painting to dry (which is the most difficult part of this process) before moving to the next layer o...